DIY Cake Topper: I Scream, You Scream, June is turning FIVE! (PART 3)
Oh my - I think I may need to write a book on Party DIY's. They're so much fun! (Not joking or being sarcastic). If you've been following, I've been writing and making my little girl June's #IceCreamPartyDIY, and we're almost down to our last DIY project!
Birthday DIY #3: Mini Ice Cream Cake Topper
Cake toppers seem so ubiquitous these days, but it was actually hard to find an ice cream cake topper that I really liked and that fit within my color scheme. So, I came up with my own.
Tip: I had waaaay too much fun at the store finding paper - so here's a tip: you can cut down on the time significantly here by ONLY going to the paper section. Or rummage through your crafts paper pile, I'm sure you'll find something there (I probably should heed my own advice).
Project Time: 30 mins
Best for Ages: 3.5+
Supplies List:
• 2 paper straws- a small piece of baker's twine (or any ribbon or string on hand)
• paper: 1 color for the cone, and any number of colors you so choose for the ice cream itself (I picked heavier stock as they hold up better as decorations)
• double sided tape
• masking or scotch tape
• scissors
• pencil + eraser
• printer to print out the template below 

Step 1: Print ice cream template
Depending on how tall you want the ice cream cones to be. The original one I made the template out of is 1.75" tall, and it worked perfectly for my cake. You can make it a little smaller or bigger if you like. I only needed to make 5 cones for 5 years old. :)
Step 2: Lay template over paper and cut out the number of cones desired
I found that it was easier to cut out the entire cone out of the colored paper that you have designated for the ice cream top, then lay the cut out over the paper for the cone (I found an amazing beige waffle-patterned paper for this at Michael's Arts and Crafts) and only cut the cone part out (it's essentially a triangle). Alternatively, you can cut out one cone out of card stock and use that to trace the rest of the cones.  Step 3: Using double-sided tape, adhere cone to the entire ice cream cone.
Look at how well June can do this part once I cut them out for her. ;)
Step 4: Arrange mini ice cream cones in a row over baker's twine and tape cones to the twine. Cut twine at desired length, and tie each end to the straw.

Step 5: Stick onto the cake! Enjoy!
Other Options/suggestions you can use with the template:
• Mini Ice Cream Banner
Yes!!! If you want to, instead of or in addition to the cake topper, simply print the template we provided to the dimensions you prefer. Follow all the same steps except no tying to straws at the end. You can make as many as you like!
• Guest Name or Food labels
Wow, awesome - follow the same steps for the cake topper and instead, adhere the mini ice cream to the straws of your drinks or plates. As they say, the possibilities are endless!
Read more
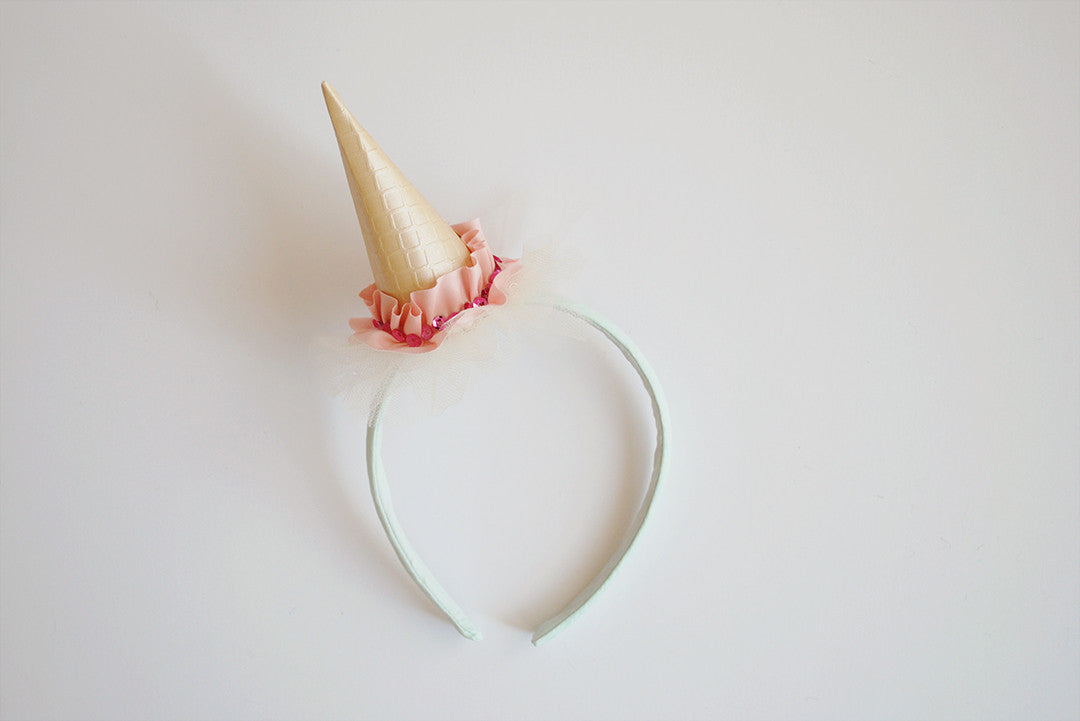
DIY Ice Cream Party Headband: I Scream, You Scream, June is Turning FIVE! (Part 2)
Hi guys!! Are you ready for Part 2 of our #IceCreamPartyDIY? Today, we are making the birthday girl her crown. Every princess must have one, doesn't she? But this one is pretty AWESOME. Also se...
Read moreEle Story Time: Dada's Day reads!
We're so excited to have a fellow Ele Story mama, Jenny Sloat, share a few of her favorite books with us (and her family), just in time for Father's Day! So grab a cup of tea, get comfortable, and...
Read more
Leave a comment
This site is protected by hCaptcha and the hCaptcha Privacy Policy and Terms of Service apply.