DIY Super Sparkly Hair Pins

My little June bug has been going through a slight hair pin obsession (understatement). She would spend at least 10-15 minutes every morning looking in the mirror and utilizing just about every hair clip she has to "decorate" her hair.
And, like so many little girls her age, she LOVES anything sparkly (another understatement). In fact, every day after school, she would gleefully run to greet me, all smiles, and her little hand would reach out to reveal a slightly dirtied acrylic gemstone or sequin that she has been clutching excitedly for a long time, just waiting to show me: "Mama! I got a sparkle for you!"
So -- this DIY was really to address a few needs: 1) June's hair pin obsession, 2) I have more Swarovski crystals than what I know to do with, and last but not least, 3) June likes to do art projects with Mama (the feeling is mutual)!
Super Sparkly Hair Pin DIY
Project Time: 20 mins per pin
Best for Ages: 3.5+
Supplies:
- Bobby Pins
- Swarovski Crystal or Sparkly Beads
- Needle (needs to be able to thread through the beads)
- Strong Thread
- Scissor


Step 1: Thread the needle, then beads, through.
Unless your little is older, you will need to do this. June insisted on pulling the beads through the needle and thread, which made me a little nervous. : P
June picked the color of the first hair pin: champagne/rose gold to match her Tutu Cute dress! Then she picked out as many beads as would fit onto one bobby pin, and we threaded all the beads through the needle. 
Step 2: Pull needle through the eye of the bobby pin, and tie a knot. 
Step 3: Slide the first bead up to the knot and, holding it in place, thread the needle back through the bead and tie a couple of knots securely onto the top of the bobby pin.
This part will take a little practice. Tip: Having a nice sturdy, but pliable thread will be very helpful. 
Step 4: Repeat the same steps with the rest of the beads until finished!
Step 5: Finish!
Cut off thread, leaving a small tail. Then, use needle to thread back through the first few beads to hide the thread. Trim off, and put pin in hair!
P.S. Halfway through the making of the rose gold/champagne one June decided to veer off and start a pink one. Hence the pink sparkly hair pin in her hands. One for Mommy, one for Baby! Or both for her (most likely what will happen)? 

June gets super giggly! 
Then, a model strut (wonder where she learned that from? hehe)!
Now she is saying, "Mommy, I want to make all the colors of the rainbow!" (oh boy...maybe another day? This Mama's tired. : P)

We would love to see your version of the Super Sparkly Hair Pin! Tag us on Instagram #EleStoryDIY or #EleDIY for a chance to be featured!
Read more
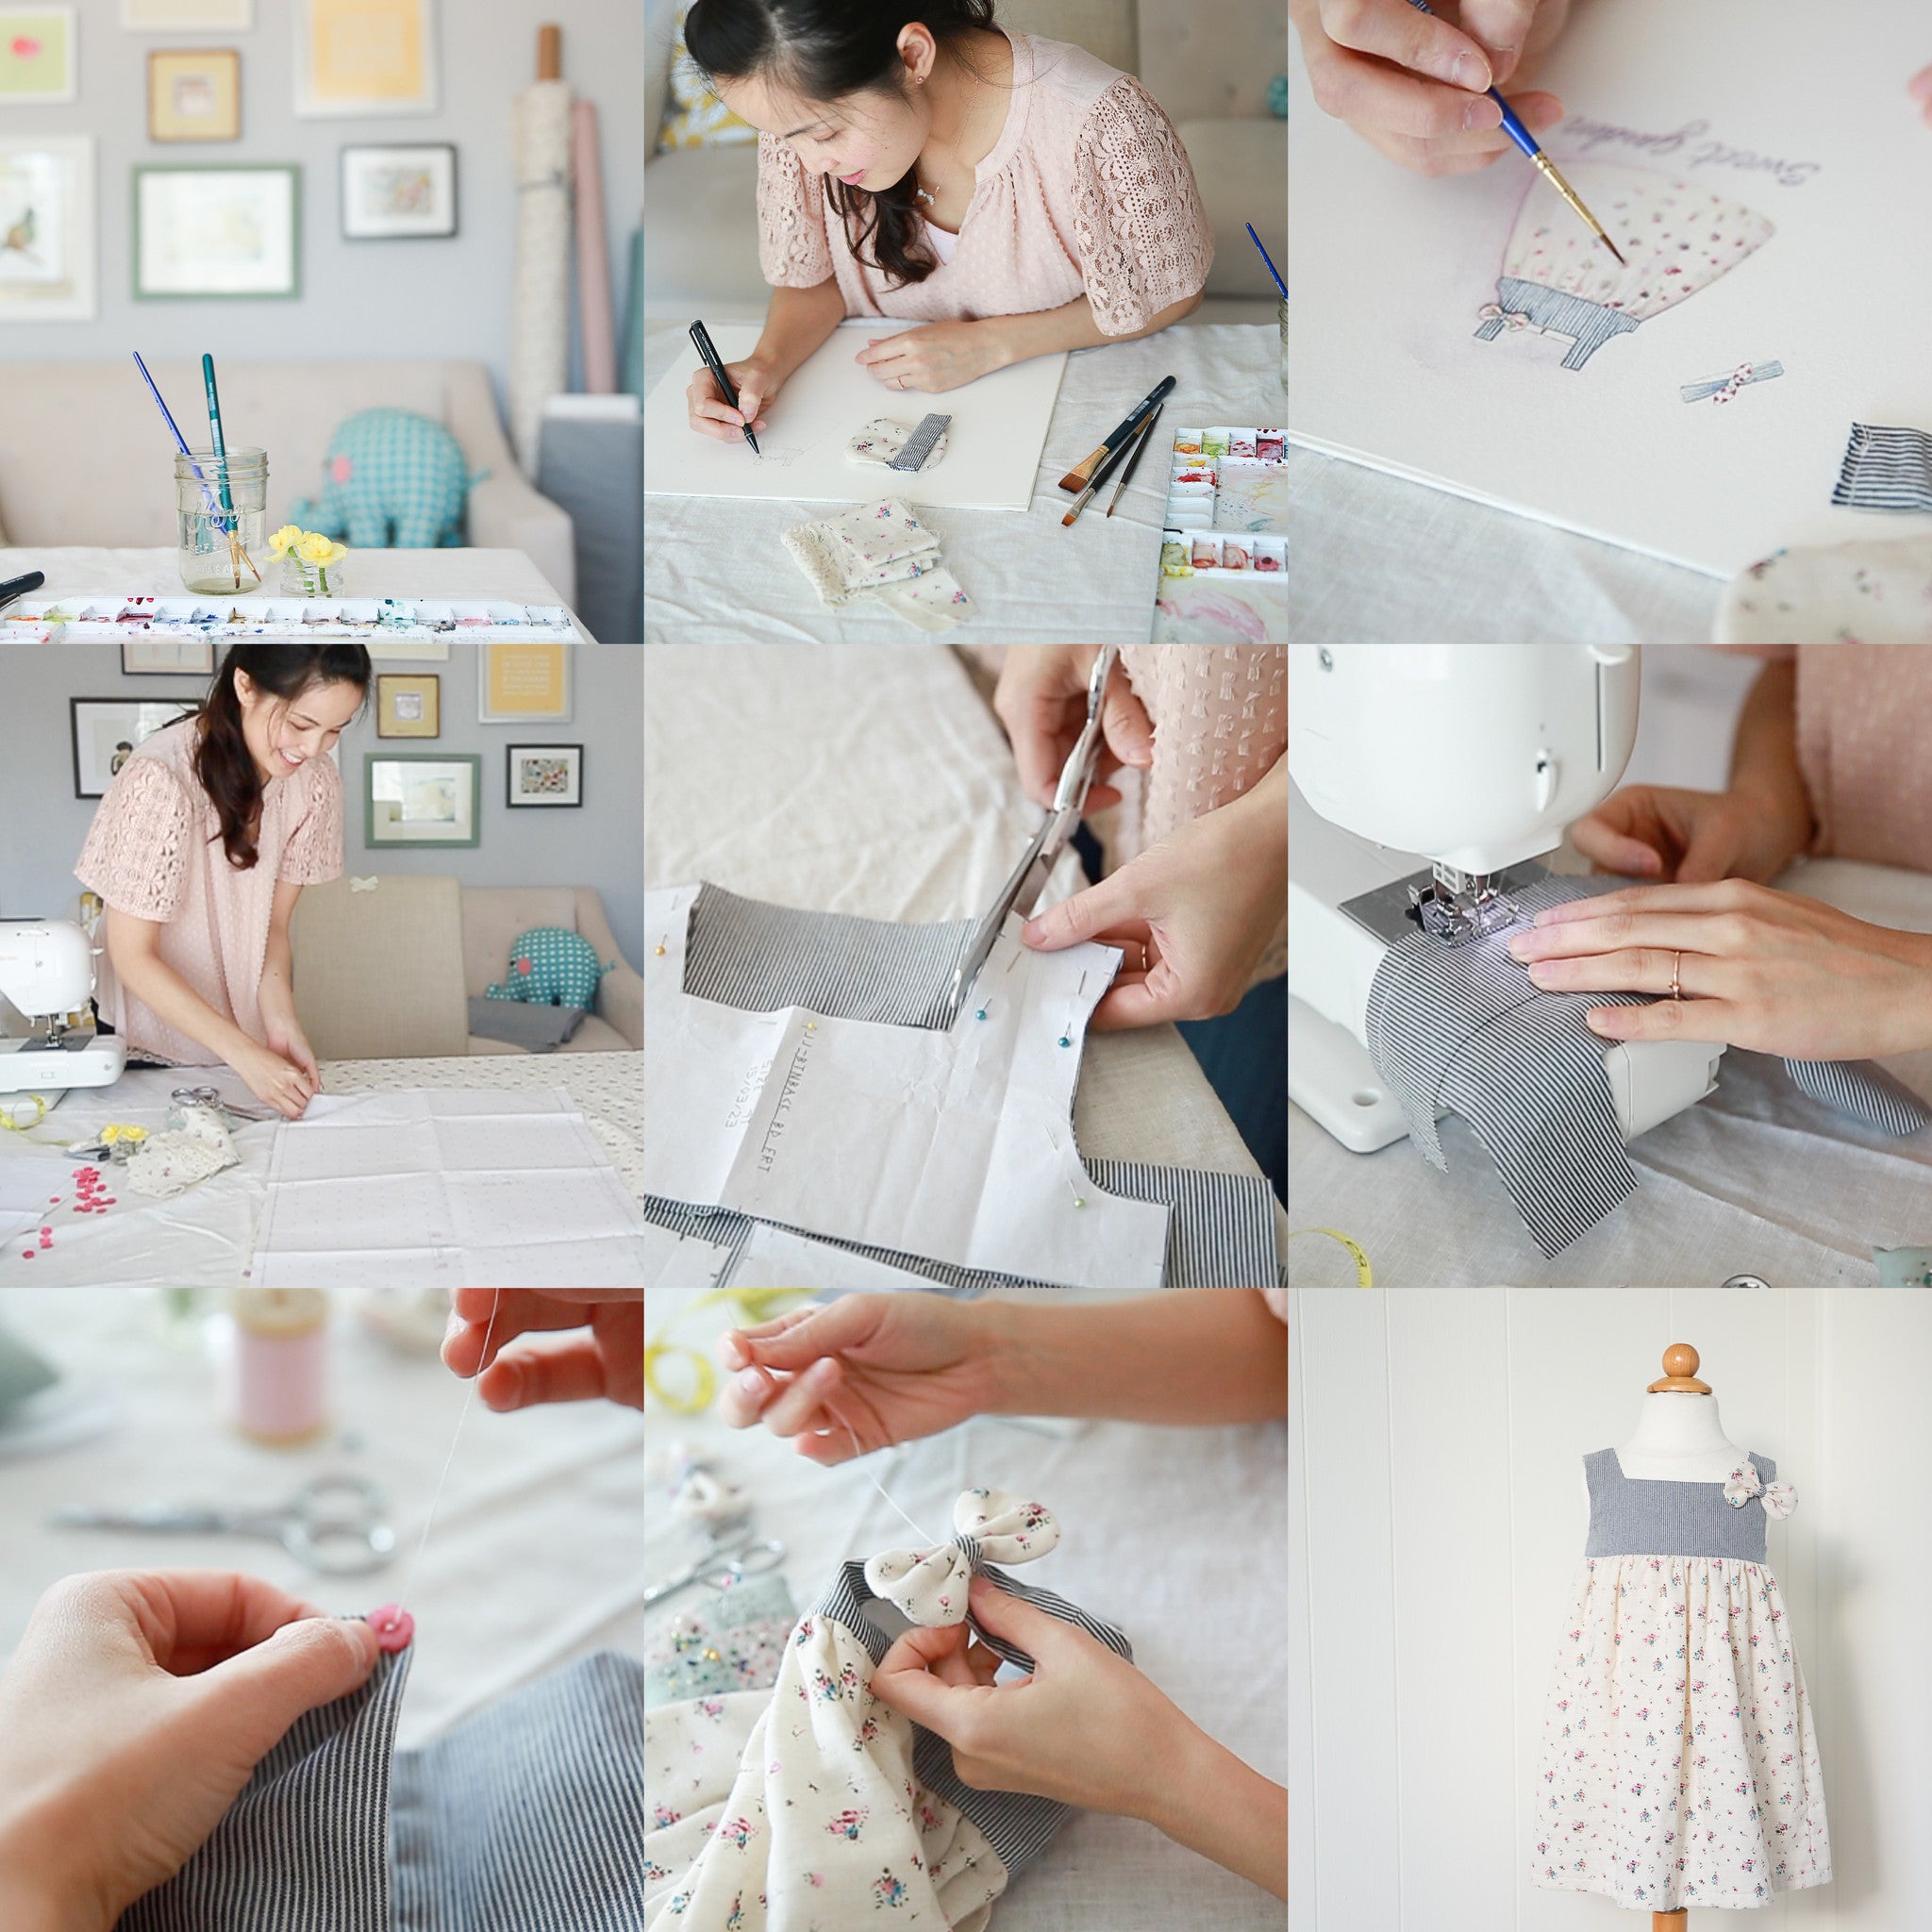
Hi everyone - I am so excited to be able to share the process of what every Ele Story piece goes through from design conception to finish. Enjoy! xoxo,Judy The Handmade Story from Ele Stor...
Read more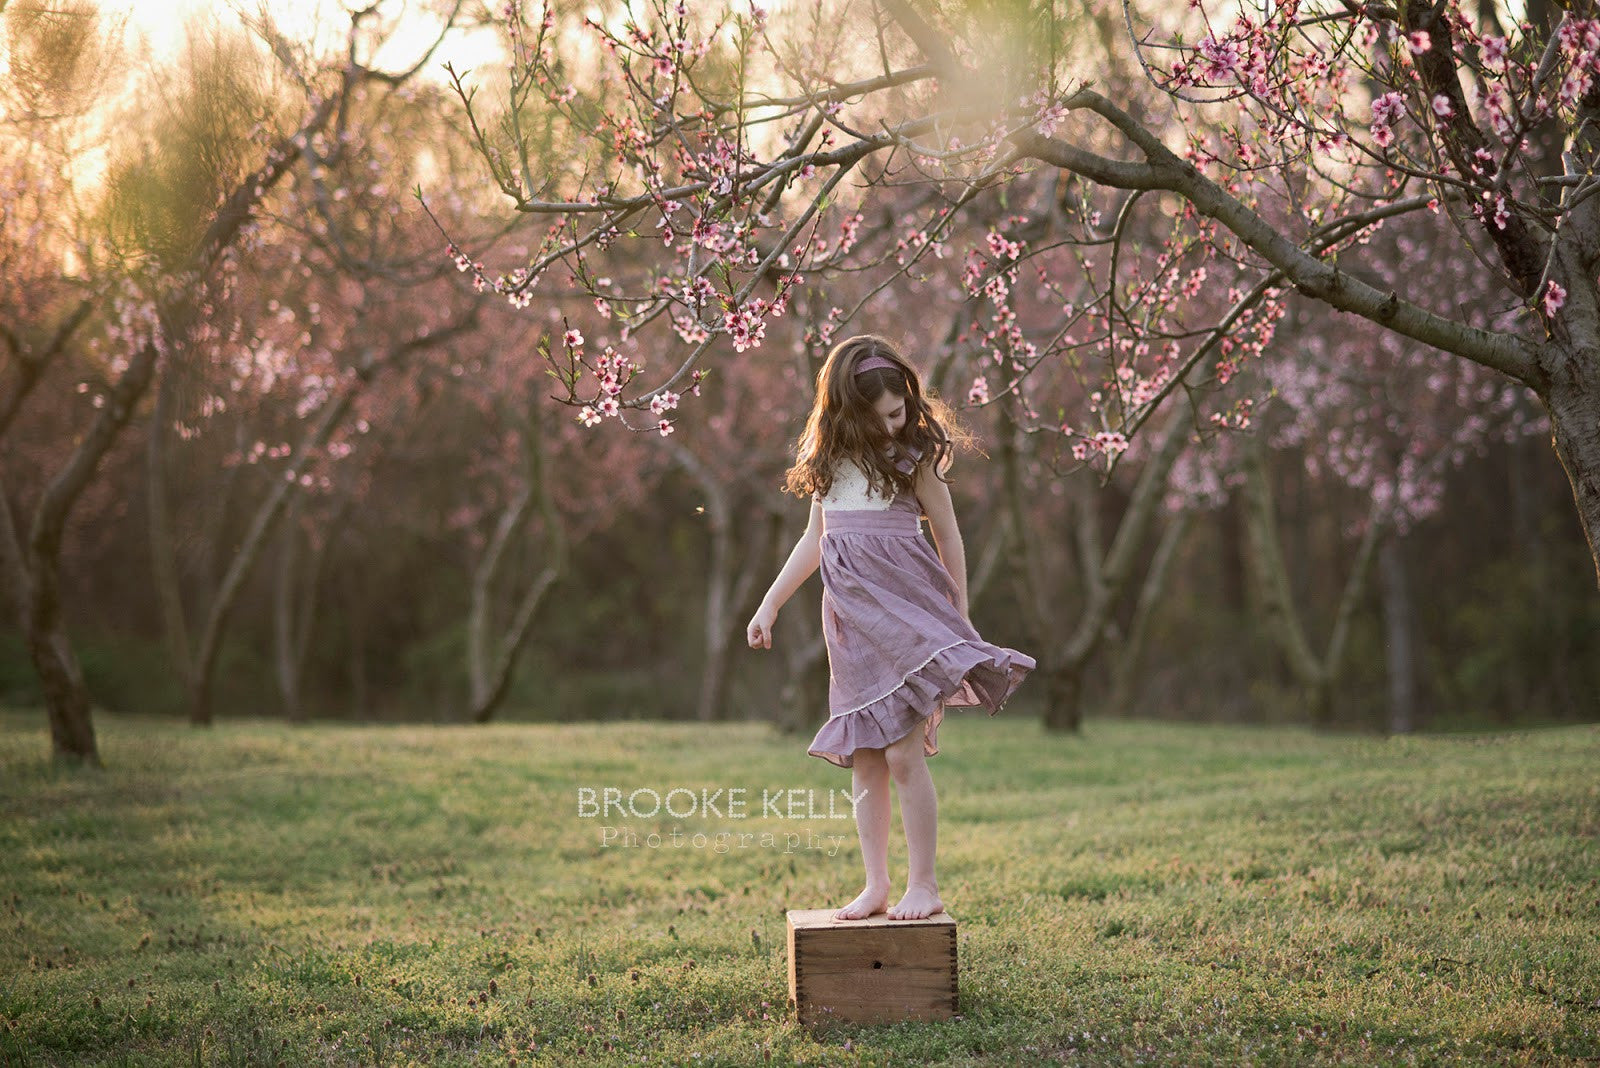
Spotlight on the everyday Ele Story Mama: Brooke Kelley
Ever since the conception of Ele Story three years ago, I have been dreaming of the day when I can spotlight everyday Ele Story moms -- real mom's like yourselves, in action. Every woman, every mom...
Read more
Leave a comment
This site is protected by hCaptcha and the hCaptcha Privacy Policy and Terms of Service apply.