DIY: Fun with Animal Masks!

June has been counting down to Halloween as soon as fall arrived this year, and she eagerly anticipates donning her princess costume (it's still a secret what she will be...but it's one of the Disney Princesses!) on the day of. After spending almost 8 hours making her "epic" costume (mainly epic because the store bought pattern was actually poorly written and I had to decode and work around some of the confusing instructions), she still clamored for more craft projects (imagine that!!!).
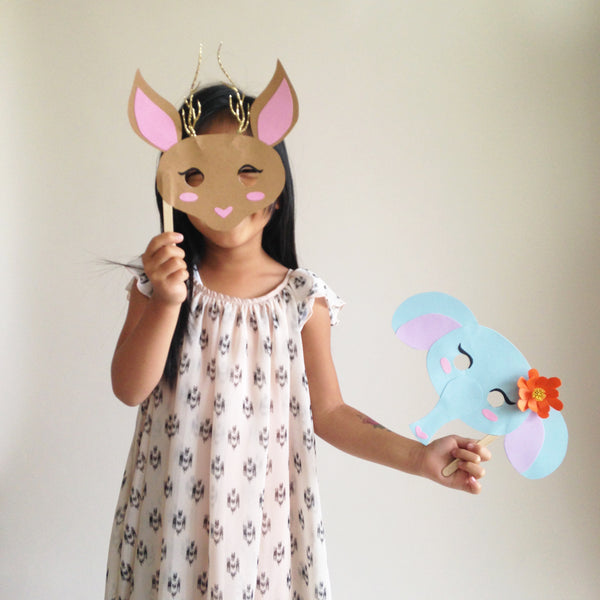
So, I thought it would be a fun thing to make a couple of animal masks, not just for Halloween but for all the games that June likes to play with us. Here are a couple of animals we came up with: a deer (there are a bunch of them in our neighborhood where we live), and of course, we had to have an elephant for Ele Story. ;)
I hope you get to try it, and #EleStoryDIY #EleCreates so we can feature your work! <3
Project Time: 30 mins
Best for Ages: 3.5+ and an adult :)
Supplies List:
- colored cardstock paper (2+ colors)
- glue
- scissors
- pencil + eraser
- printer to print out templates
- craft sticks
- Optional: branches (synthetic or real - we found some at the dollar store!)
Step 1: Print out the following templates
Print out onto 8.5”x11” paper and cut out the pieces.

Step 2: Cut out shapes
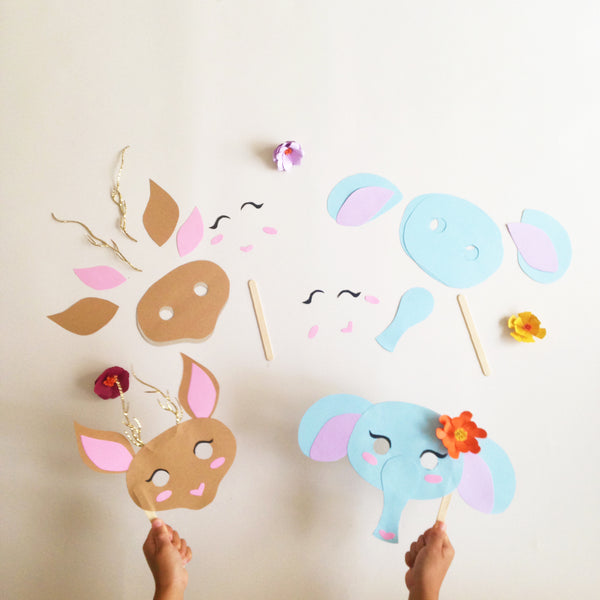
Lay the pieces over your colored paper and cut out the shapes. It helps to trace the template pieces onto the colored paper, especially to cut out the eye holes. Cut the following numbers of each piece:
Elephant Mask: 2a. 2b. 2c. 2d. 2e. 1f. 1g.
Deer Mask: 2a. 2b. 2c. 1d. 2e. 2f.
Step 3: Glue the pieces together
Starting with the ear pieces glue the inner piece (pink) onto the outer ear piece. Make sure to reverse the pieces to make a right and left ear. Then attach the ears onto the base of the mask (piece a). Glue on the facial features (eyelid, nose, and blush for the cheeks!).
Optional Step: Decorate your mask!
We chose to add extra decorations to give our masks a bit more charm.

Step 4: Attach the craft stick as a handle.
Glue the craft stick towards the side of the mask to be a handle.
We attached the second piece of paper (piece a) to the back to make the mask sturdier.


Leave a comment
This site is protected by hCaptcha and the hCaptcha Privacy Policy and Terms of Service apply.